How to "Hard-code" your Api key for using the Browser Extensions
📅 Published on Feb 02, 2025
⏳ Reading Time: 4 minutes
👍 Like & Share
🔗 Visit CaptchaSonic → CaptchaSonic Dashboard
1. Introduction to CaptchaSonic
CaptchaSonic is an advanced platform designed to solve CAPTCHAs quickly and efficiently. Built using cutting-edge AI and ML technologies, CaptchaSonic simplifies CAPTCHA-solving for developers, enabling seamless automation of web-based tasks.
Let’s take a look at how AI can solve CAPTCHAs hassle-free.
🔗 GitHub Repository: GitHub/CaptchaSonic
2. Setting Up Your CaptchaSonic Account
Step 01:
Visit the official CaptchaSonic website to create your free account.
Step 02:
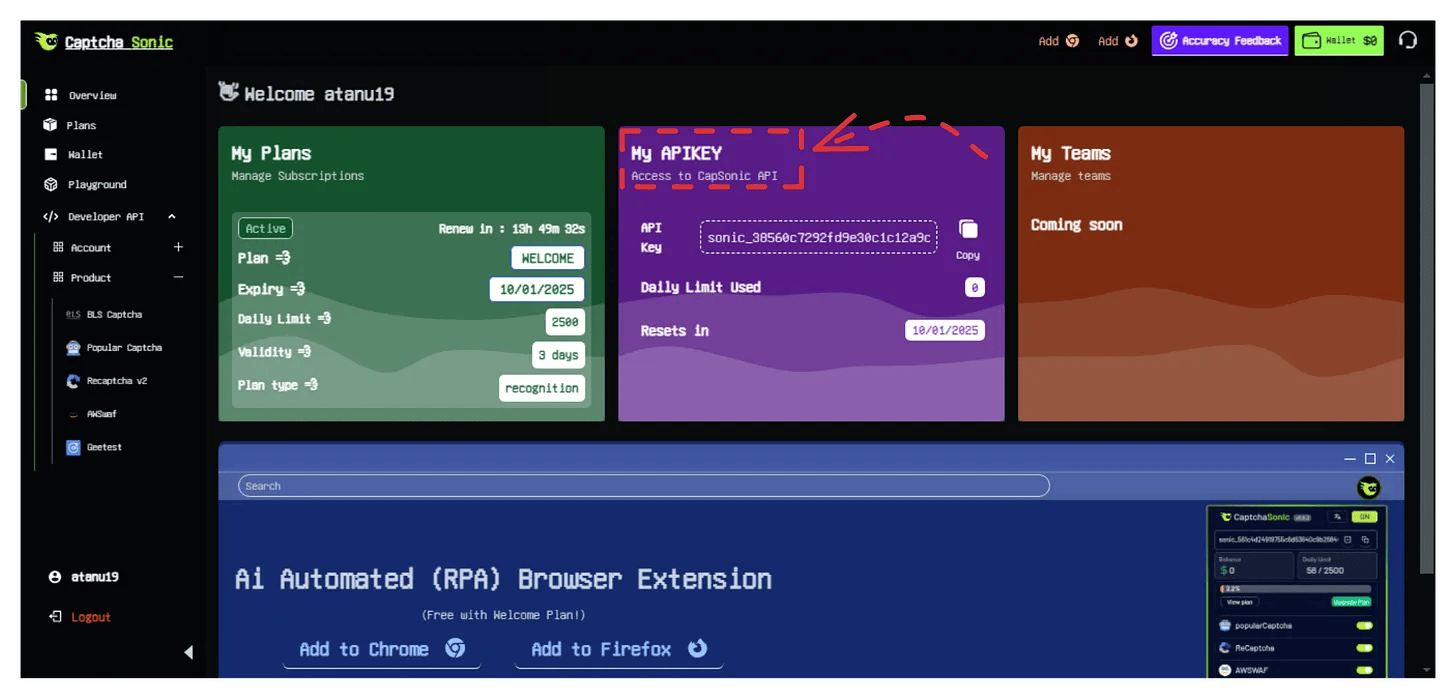
Log in to your account now to obtain your unique API key.
 `
`
Step 03:
Copy the API key provided in your dashboard.
3. For Chrome Users:
Now installing the CaptchaSonic Browser extension, by Hard-Coding the unique Api-Key
Step 01:
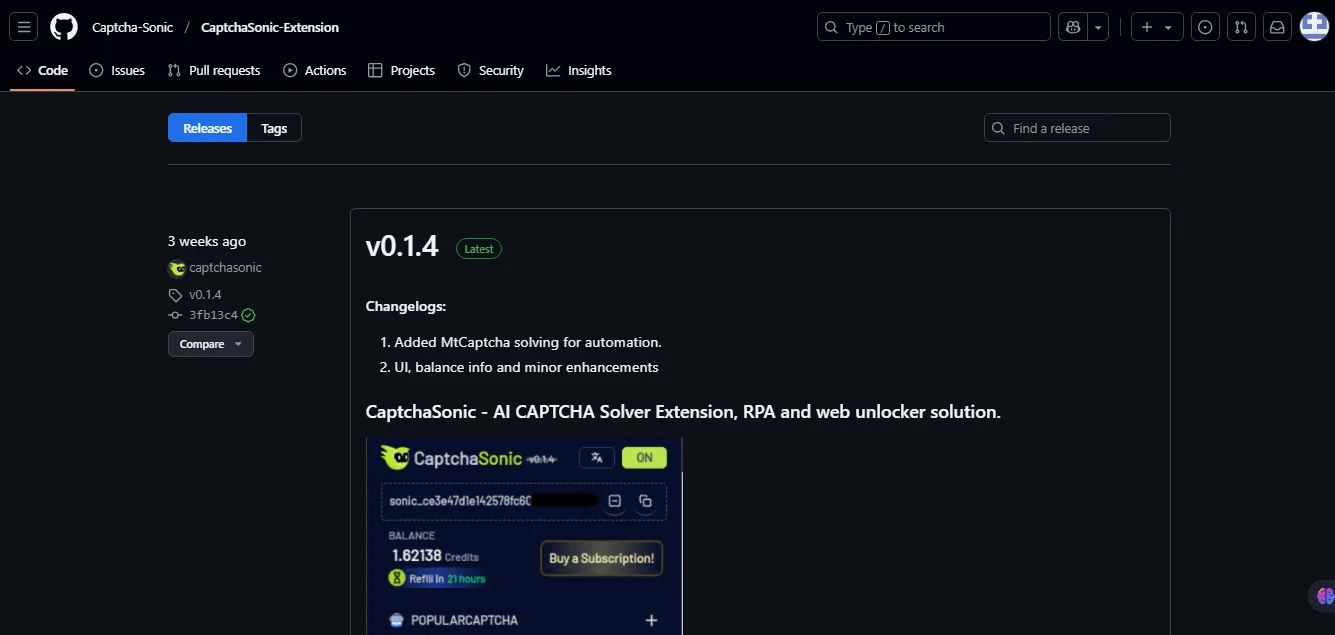
Visit the CaptchaSonic GitHub Repository.
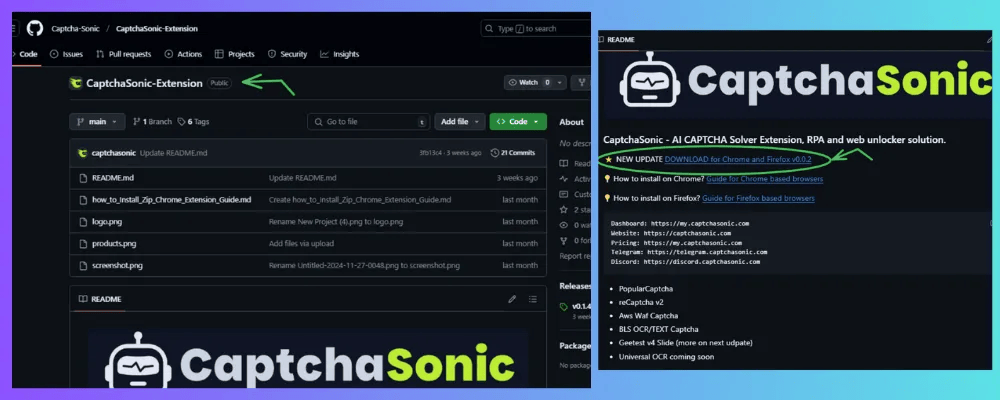
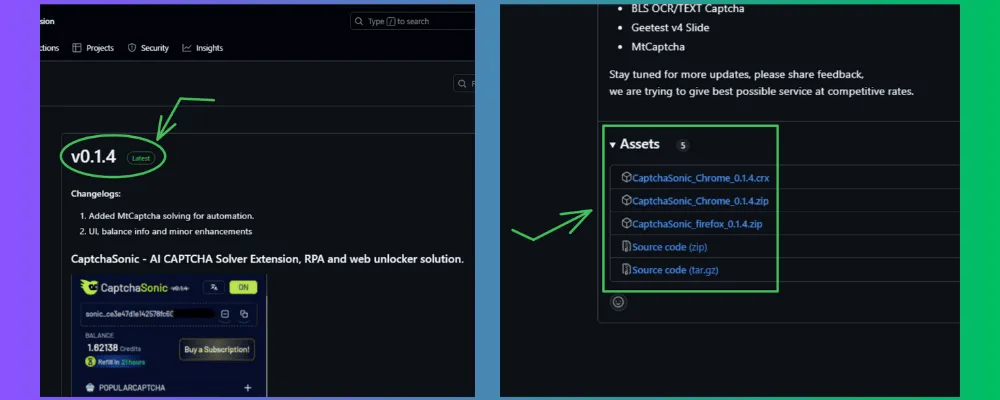
Step 02:
Go to the release page and scroll to the assets section. Download the CRX/ZIP file (v0.1.4) as shown below.
Step 03:
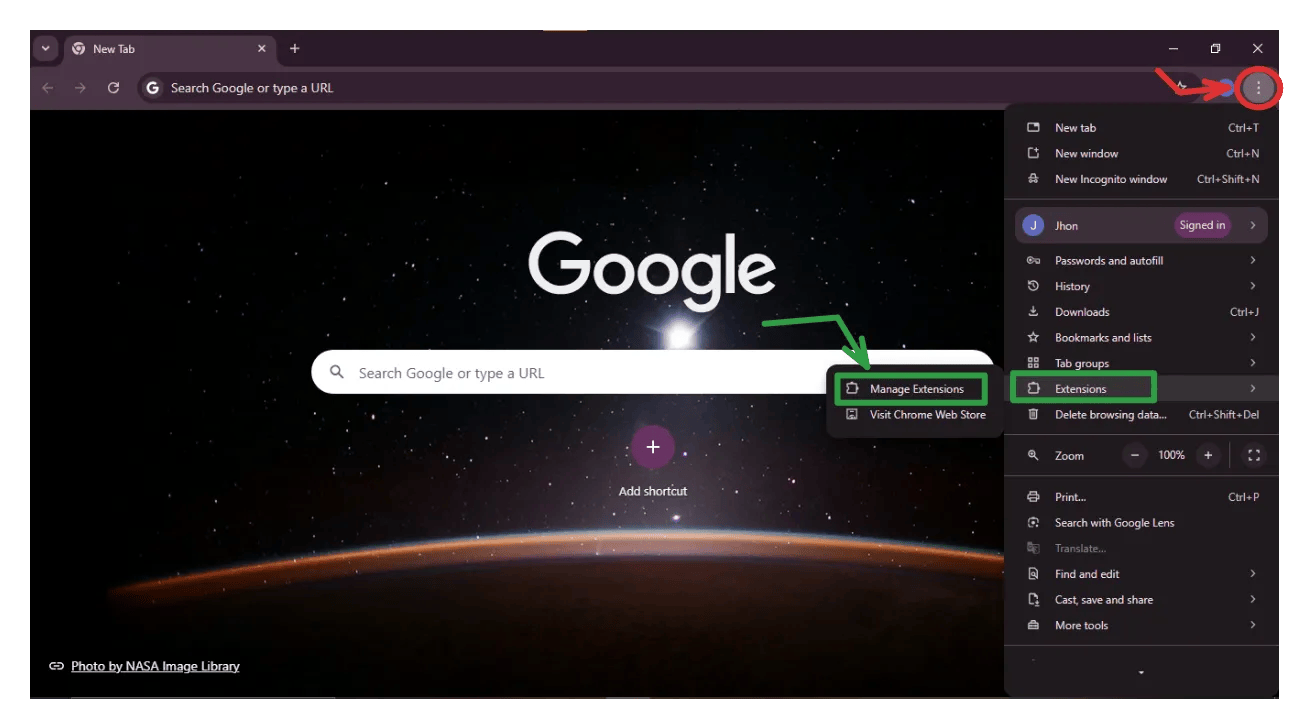
Open your Chrome browser and navigate to: chrome://extensions/
Click on the Customization menu (top-right corner) → Manage Extensions.
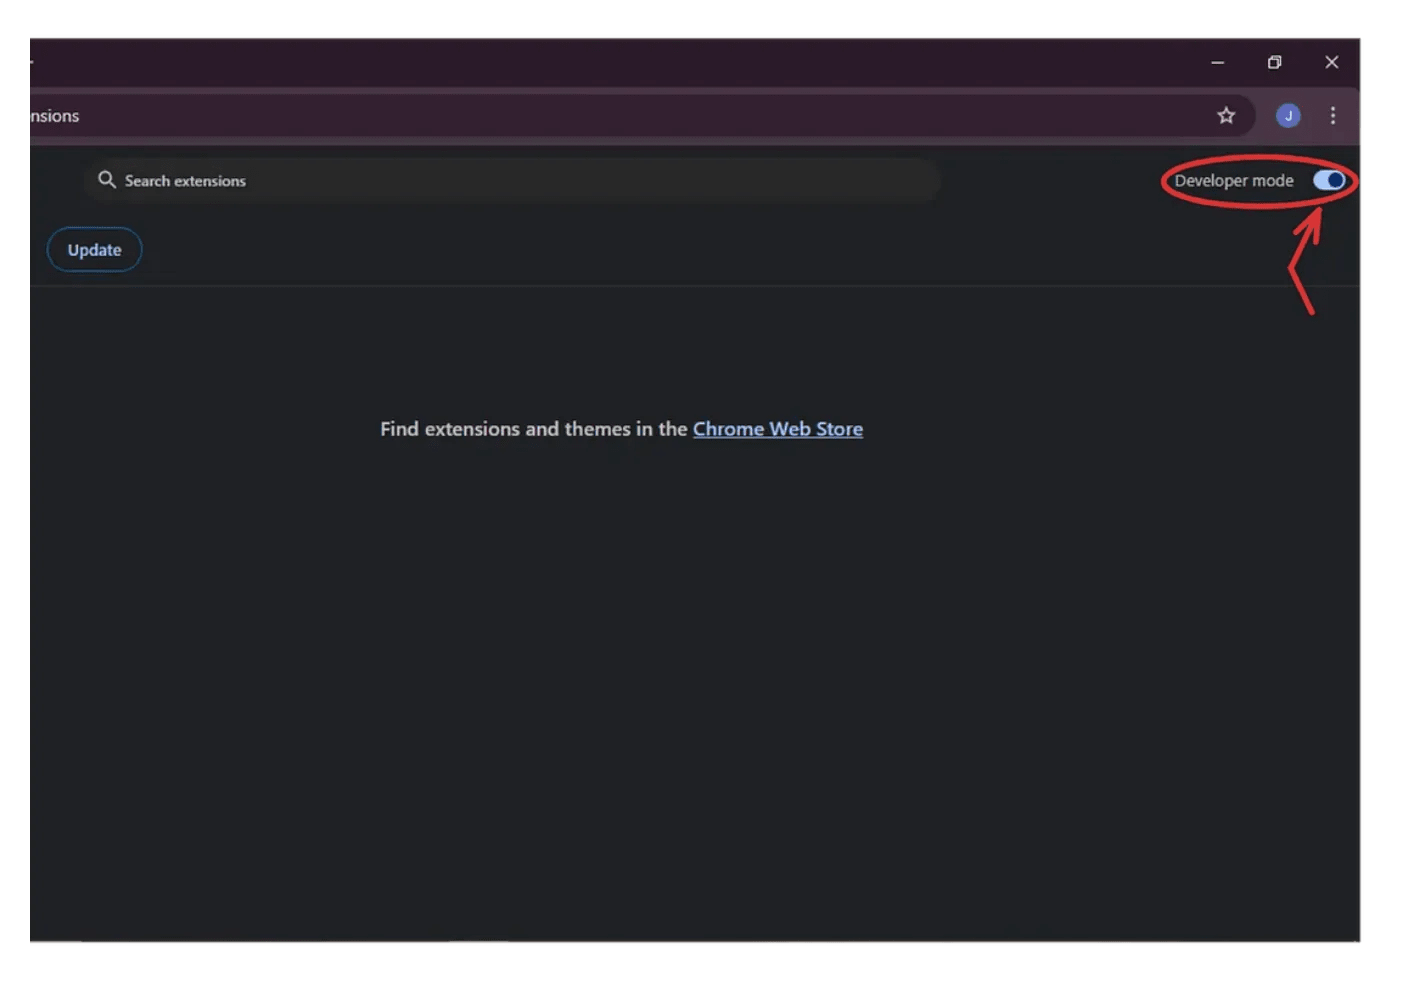
Step 04:
Enable Developer Mode by toggling the switch in the top-right corner.
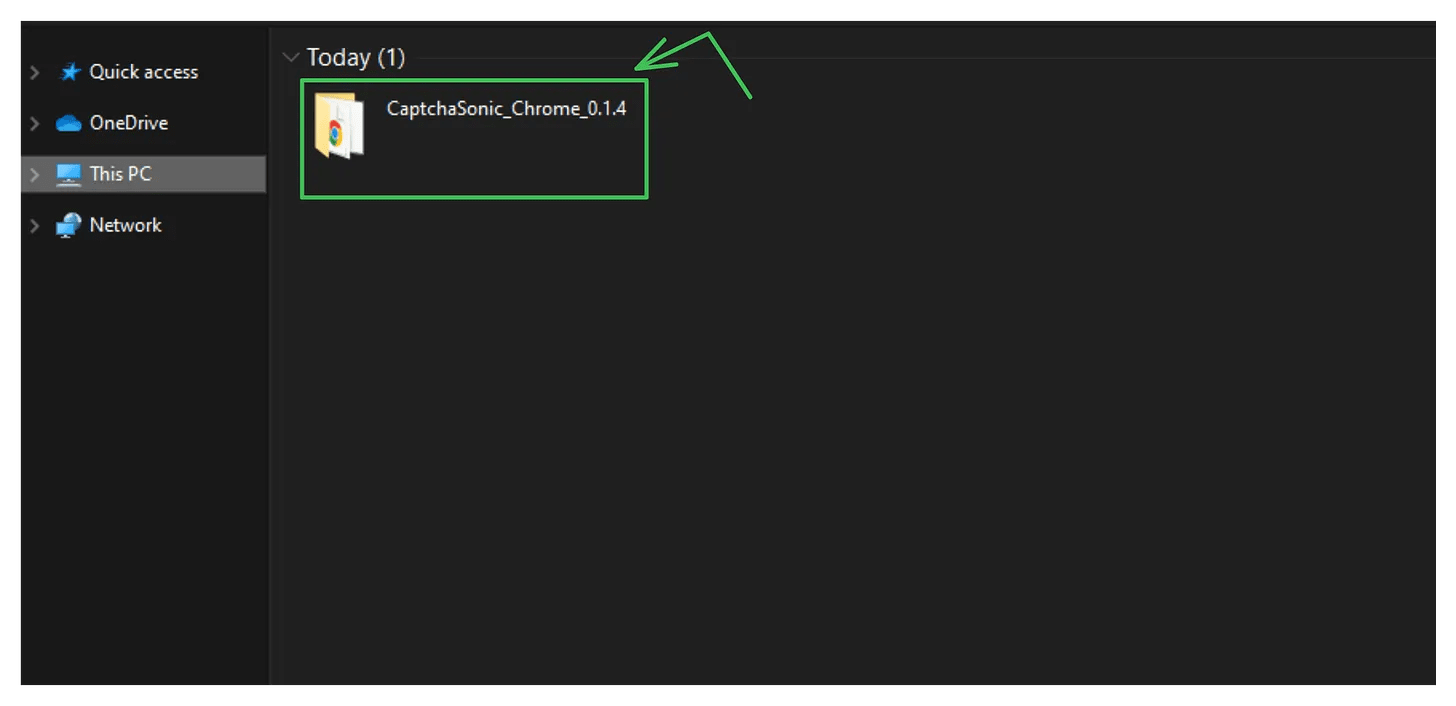
Step 05:
From the Downloads folder, double-click on the downloaded CRX/ZIP file.
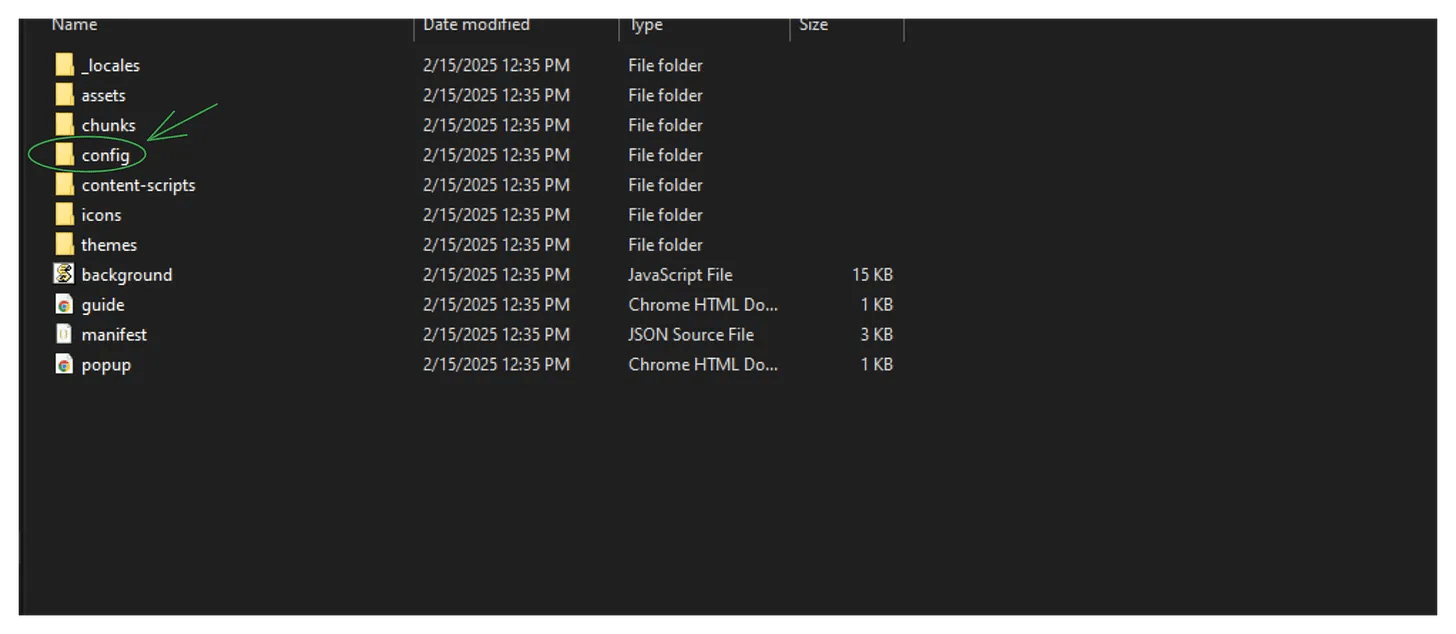
Step 06:
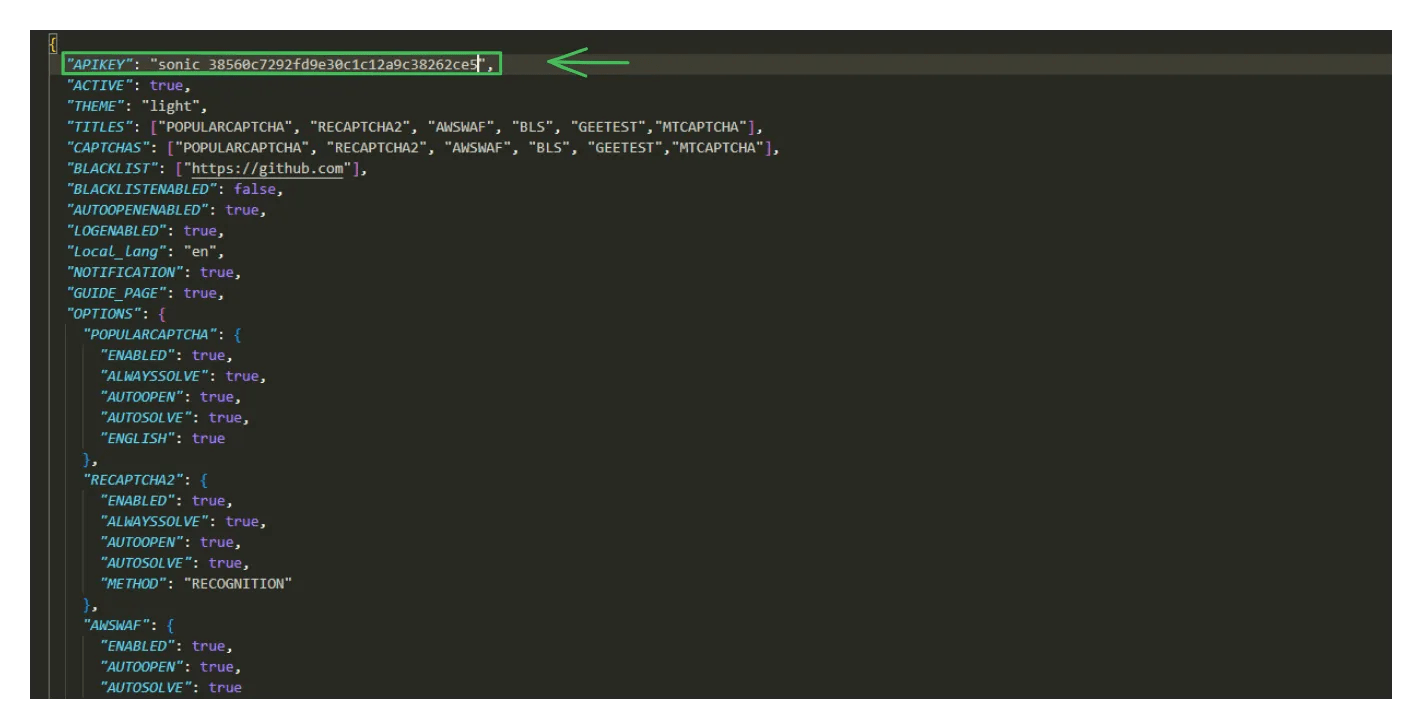
The extracted folder will appear. Open the config folder and then the default config file using a code editor (e.g., VS Code).
Step 07:
You’ll notice the API key field is blank. Copy your API key from the CaptchaSonic dashboard and paste it as the default API key. Save the changes.
Step 08:
Drag & drop the modified extension folder into the Chrome Extensions page.
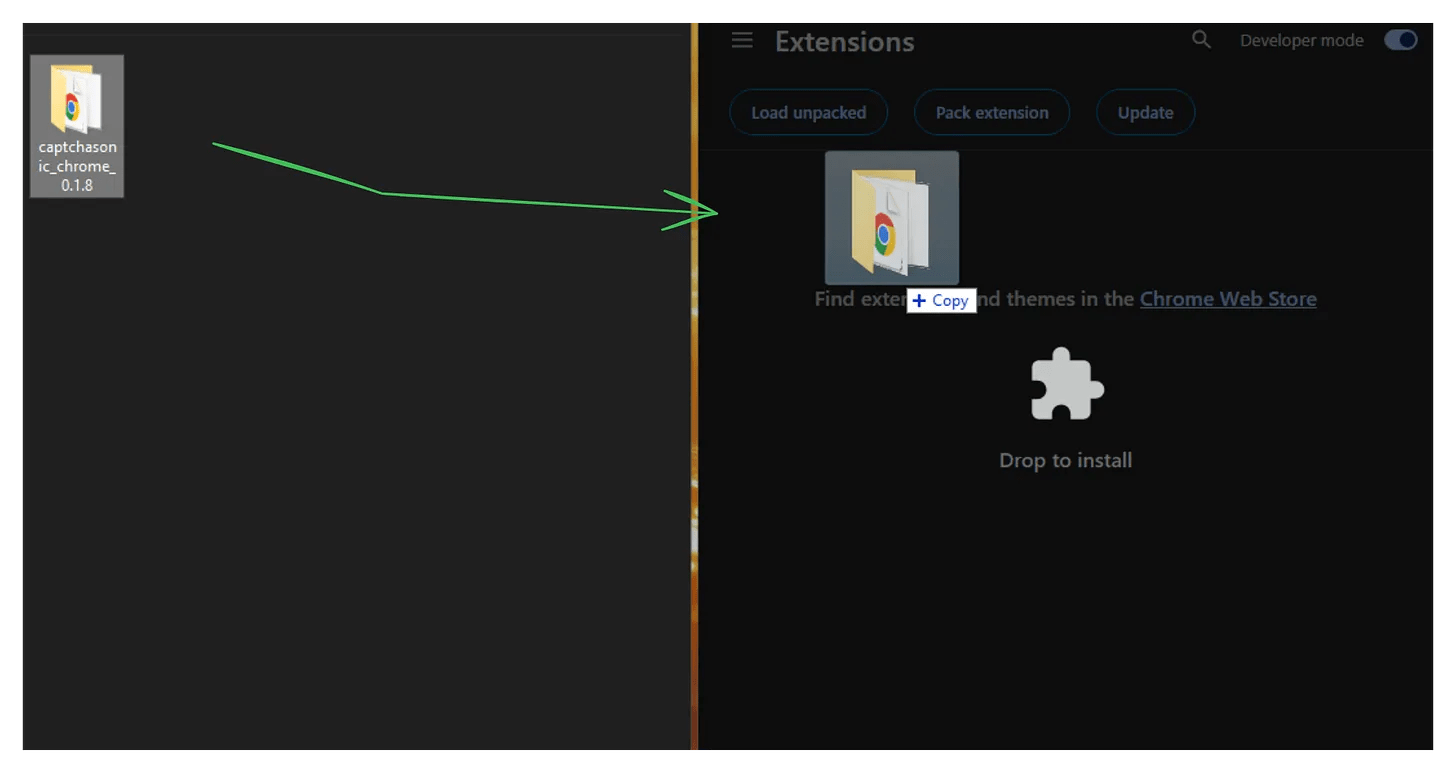
Step 09:
Your extension should now be loaded successfully!
For Firefox Users:
Follow the same steps as done for Chrome:
Step 01:
Visit the CaptchaSonic GitHub Repository,or else you can go through the Dashboard

Step 02:
Download the latest Firefox Add-on.
Step 03:
Scroll to the assets section, locate the Firefox extension file, and download it.

Step 04:
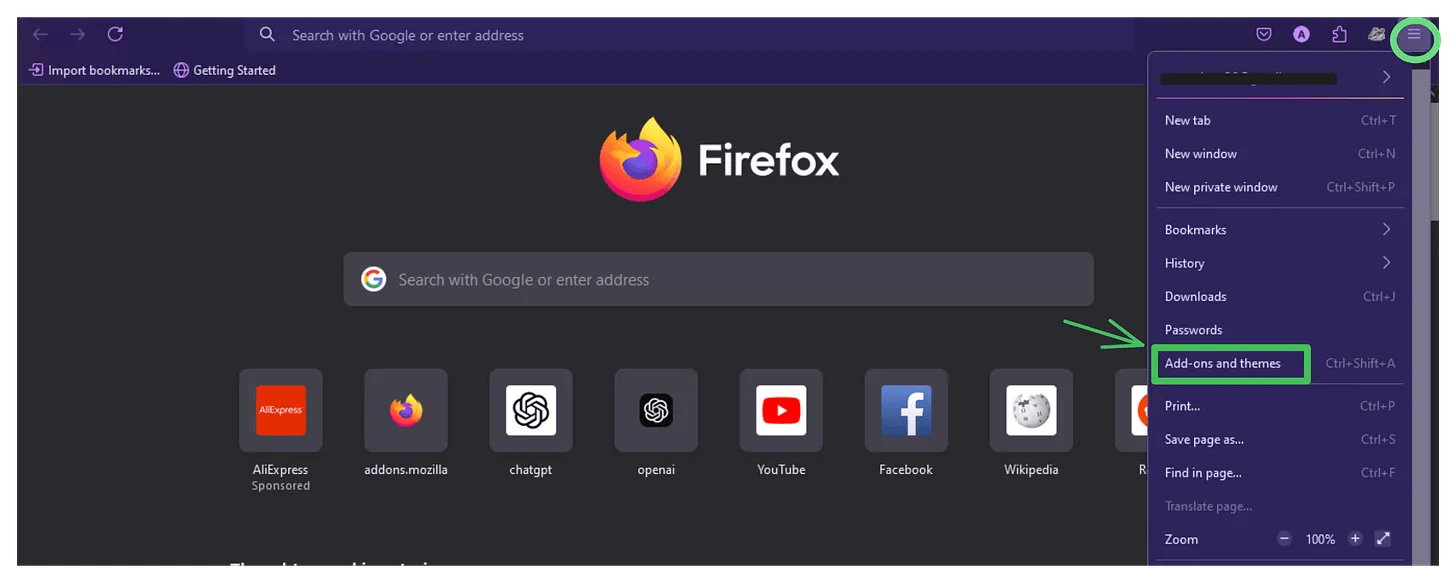
Open Firefox → Tap on the three-dot menu (top-right) → Add-ons & Themes.
Step 05:
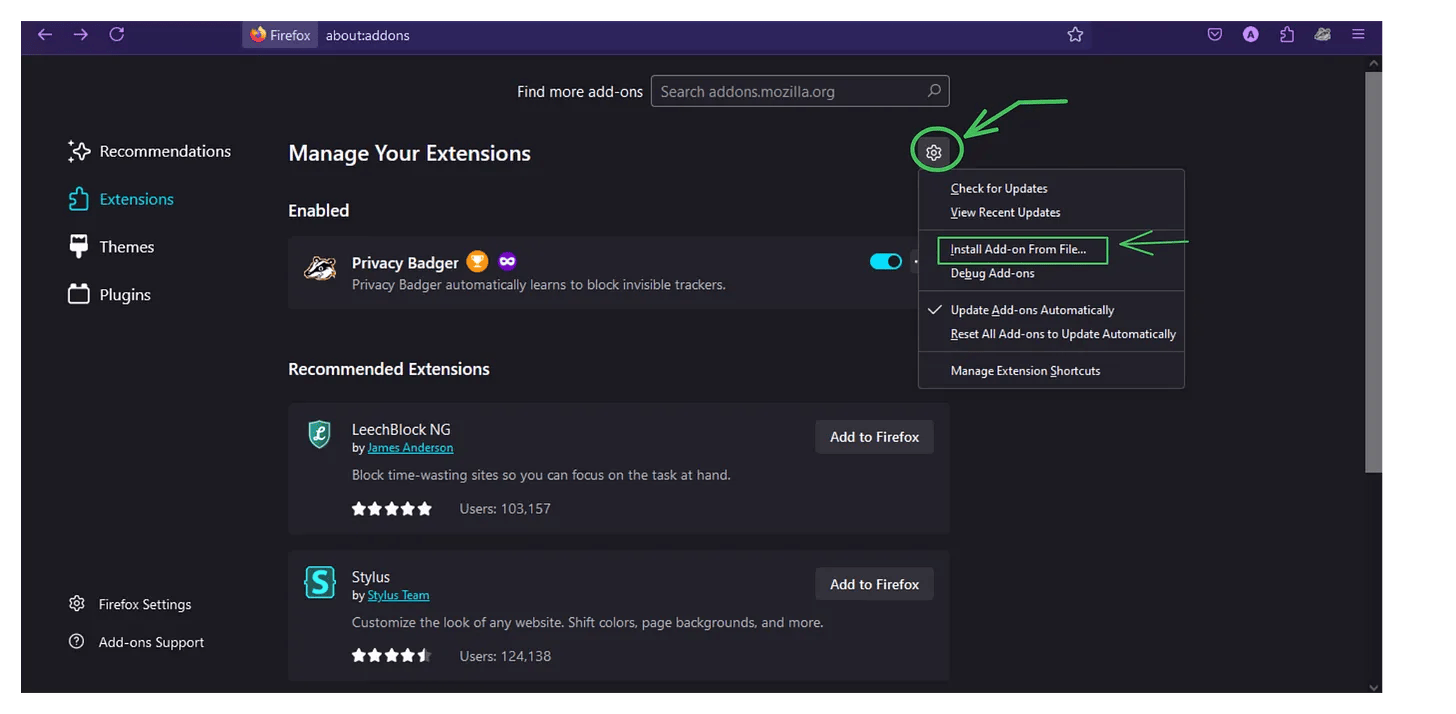
Click the gear icon and select “Install Add-on From File”.
Step 06:
Select the downloaded Add-on file to complete the installation.
4. Configuring the Extension
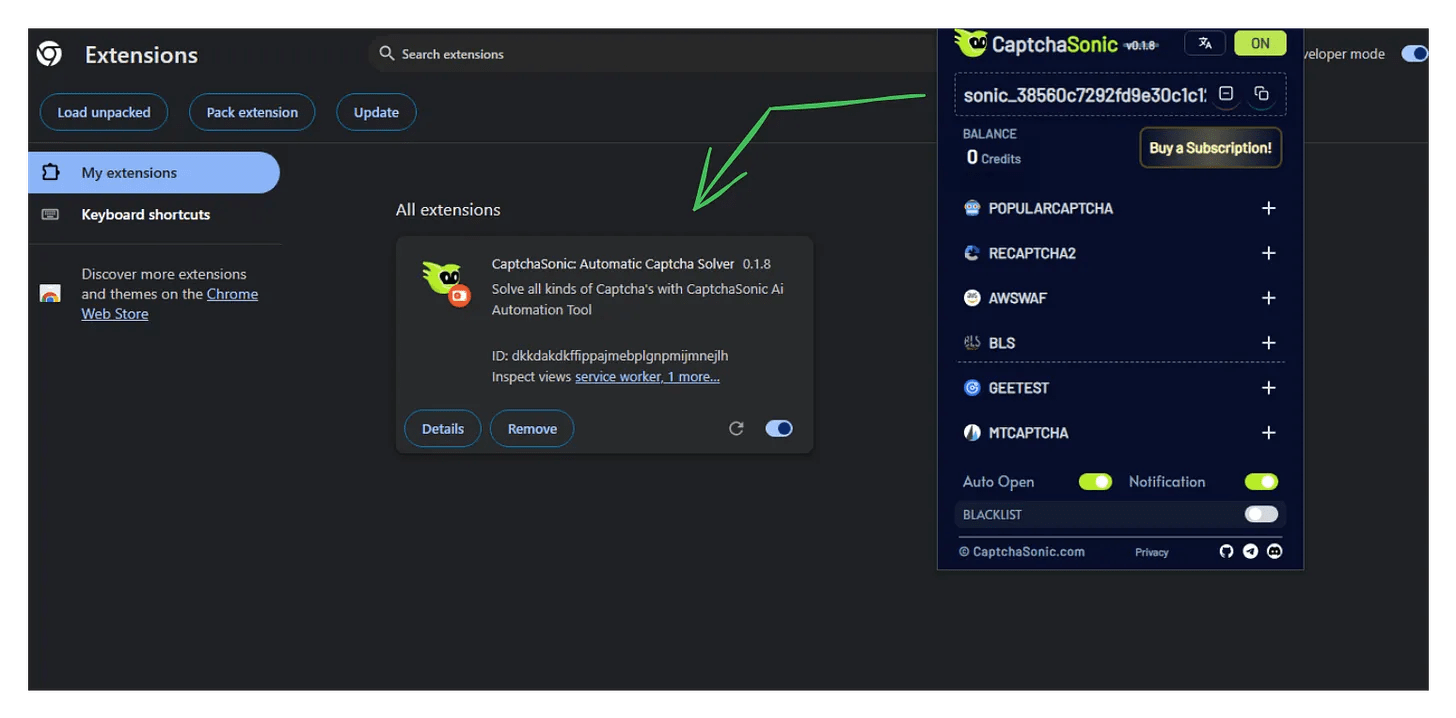
Step 1:
Click on the CaptchaSonic Extension icon in your browser’s toolbar.
Step 2:
Paste your API key into the designated field within the extension settings.
Step 3:
Adjust additional settings, such as enabling/disabling specific CAPTCHA types.
5. Using the Extension
- Once configured, the CaptchaSonic extension will automatically detect and solve CAPTCHAs.
- When a CAPTCHA appears, the extension will process it in the background, allowing you to continue browsing without interruptions.
6. Managing Your Account and Usage
Log in to your CaptchaSonic Dashboard to monitor:
- Usage statistics
- Subscription plans
- Remaining credits
7. Conclusion
By following this guide, you can enhance your browsing experience with the CaptchaSonic browser extension, bypassing CAPTCHA challenges effortlessly.
🔔 Stay updated with the latest features! Regularly check the CaptchaSonic Dashboard for updates.
📢 Subscribe for More Updates!
✍️ Written by Jhon_ - Blogger & Content Creator
🚀🚀 Like, Share & Subscribe to our updates.